| Print this page |
|
||
| Optical toys: making drawings move using techniques based on optical toys | ||
|
FlipbooksThe easiest way to make a flipbook is to use an old book and draw along the top margin, or down
the right-hand margin. A bouncing ball is simple one to start with. Making a proper flipbook requires a block of pages about 10x5cm. Thin card is better to flip than paper. It needs to have about 20 pages or more otherwise it is too flimsy to flip. The top has to be stapled or held with a spring clip. You can start with blank pages, and working from the bottom page up, draw a sequence. You work from the bottom page because this allows you to see the previous drawing. If you prefer to work from the top down, it helps to have a piece of carbon paper so that you can trace the none-action part of the picture onto the page below. You can also photocopy sheets with part-drawn pictures. Photocopy onto thin card if possible, though paper will work. Draw a face on the bottom page without a mouth, then trace over it on the top page. Put a sad mouth on the top one and a happy mouth on the bottom one. Now roll up the top page with the pencil, and just run the pencil up and down to flip the page. |
||||
Link: Flipbooks |
||||
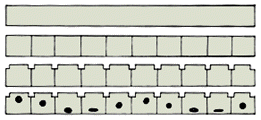
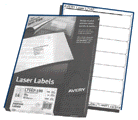
ZoetropesYou can buy Zoetropes from animation equipment suppliers, but they are quite easy to make. An old record player is perfect. You need a strip of stiff paper marked out. (show) A useful way of producing a series of drawing the same size is to have them printed on laser labels. Only the still part is printed, the action part is drawn in.
|
||||
Link: Build a Zoetrope |
||||
Email: stan@makemovies.co.uk. Page last updated:
© 2002-2009 Stan Hayward. All rights reserved.